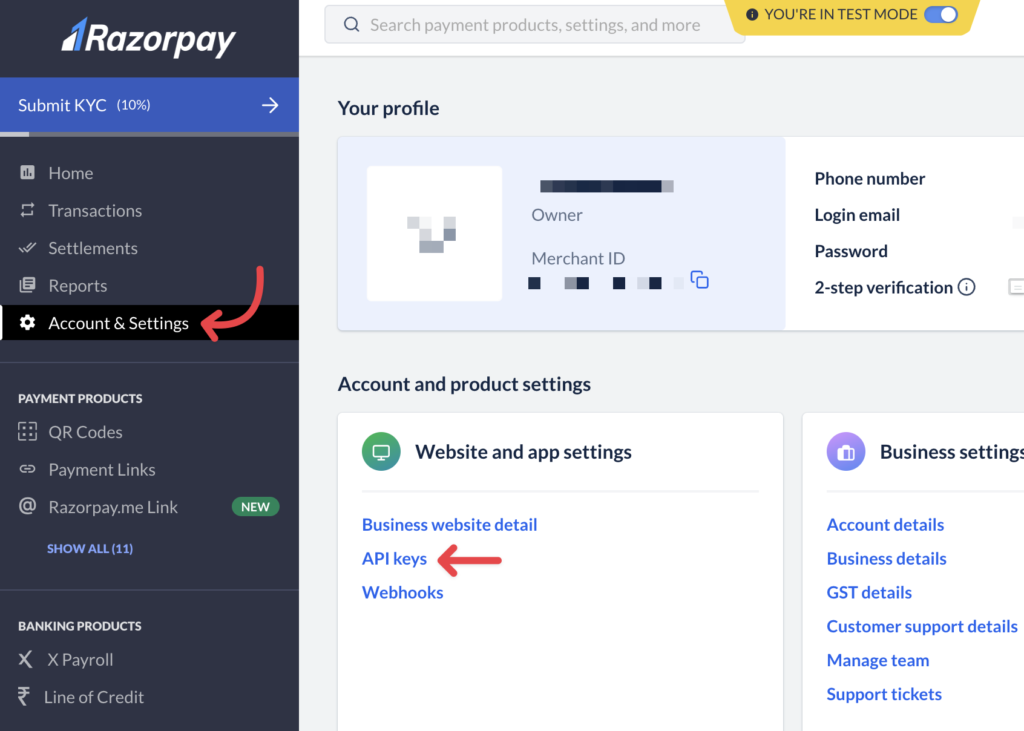
1. Get API keys from your RazorPay account
2. Enter them in LatePoint Settings -> Payments -> RazorPay form
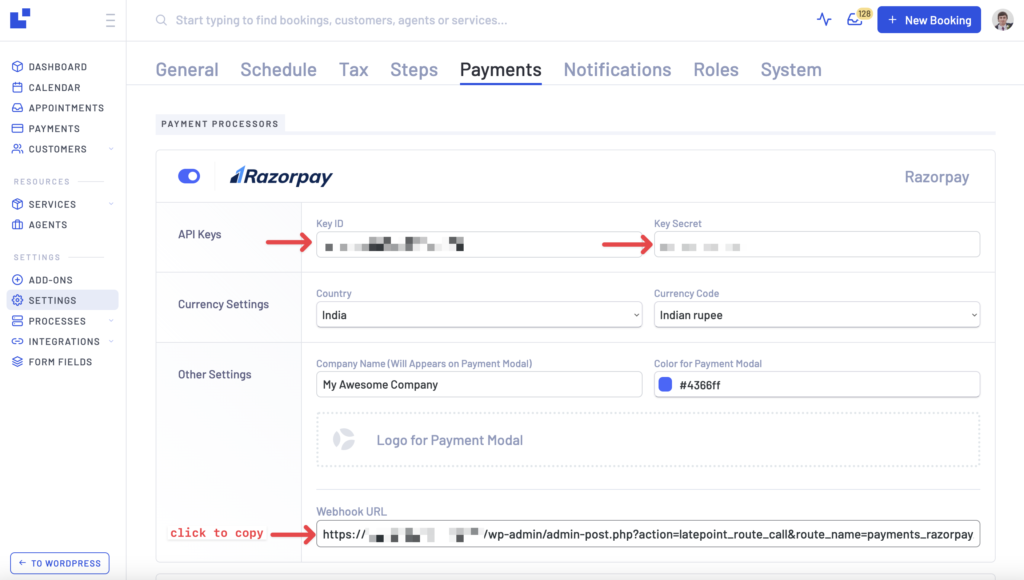
3. Copy webhook URL from LatePoint settings for Razorpay

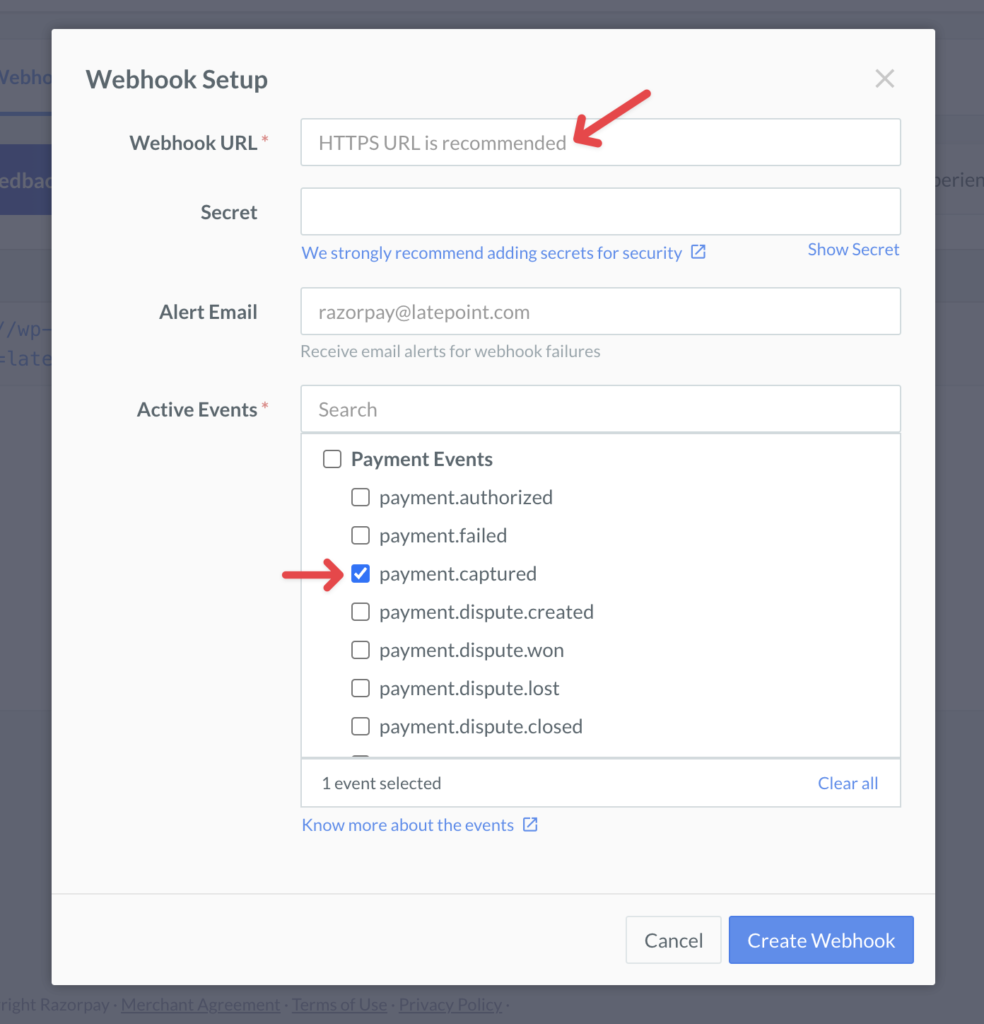
4. Go to “Developers” section in your Razorpay account and create a new webhook. Enter a url that you copied form a previous step into the Webhook URL filed of the Webhook Setup popup. Select payment.captured event to be sent via a webhook in RazorPay settings
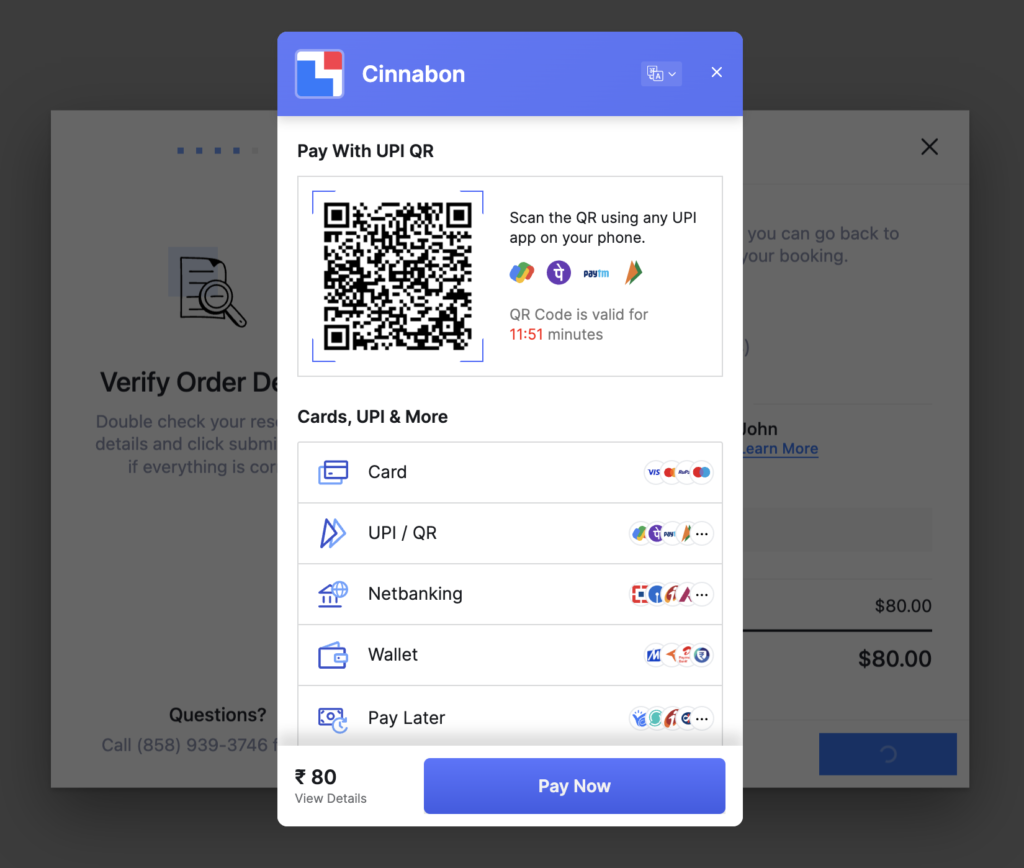
That’s all! Now when making a booking for a service that has a “charge amount” value set, your customers will see a payment modal appear: