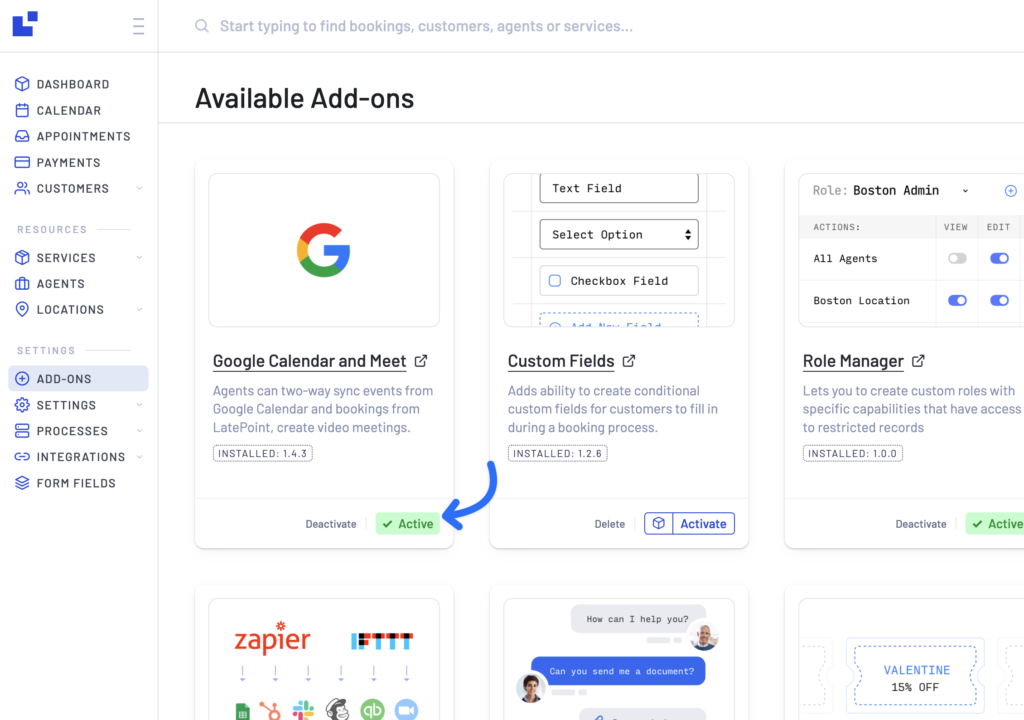
1. First step is to install and activate the Google Calendar and Meet Add-on. You can find it under “Settings -> Add-ons” page in your LatePoint admin:
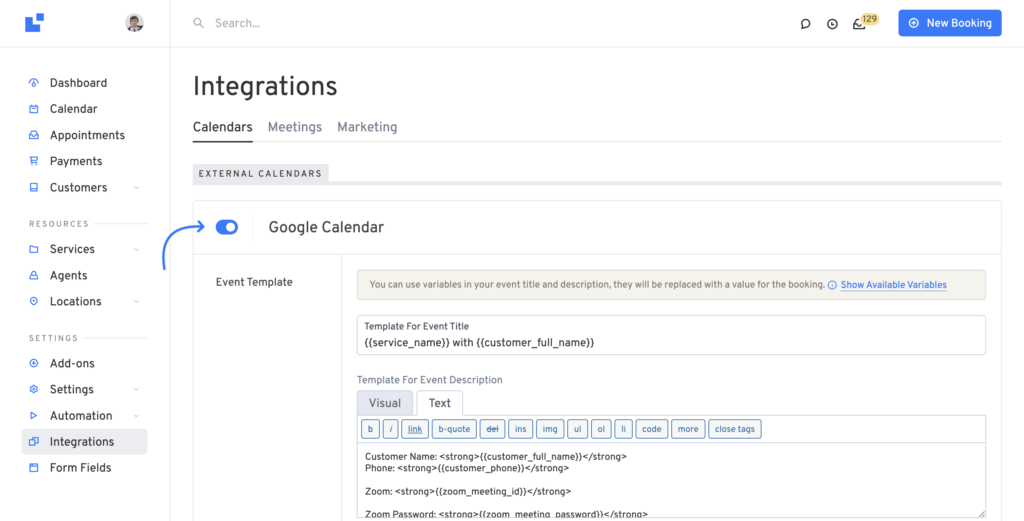
2. Enable it under Integrations -> Calendars:
3. Now your agents can sign into their google account from the agent edit form, there will be a new box on the very bottom of “Edit Agent” page, click “Sign in with Google” and login to their google account:

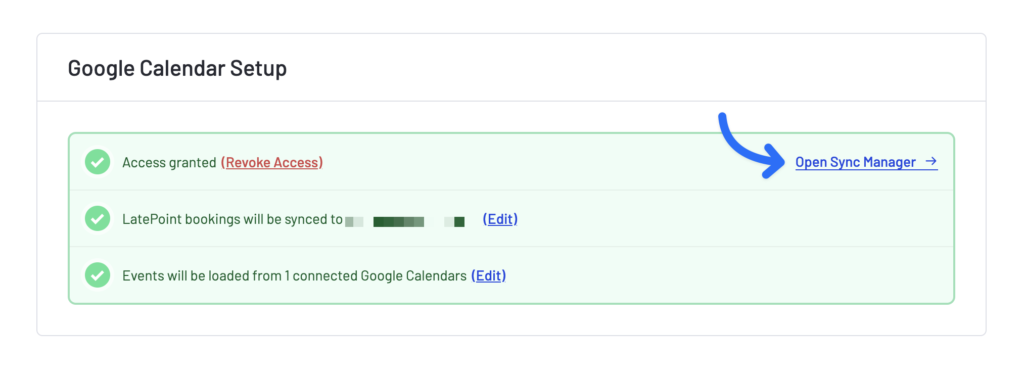
4. Once connected, you’ll be able to pick calendars it pulls and pushes events to and the box will change to green with a new link “Open Sync Manger”:
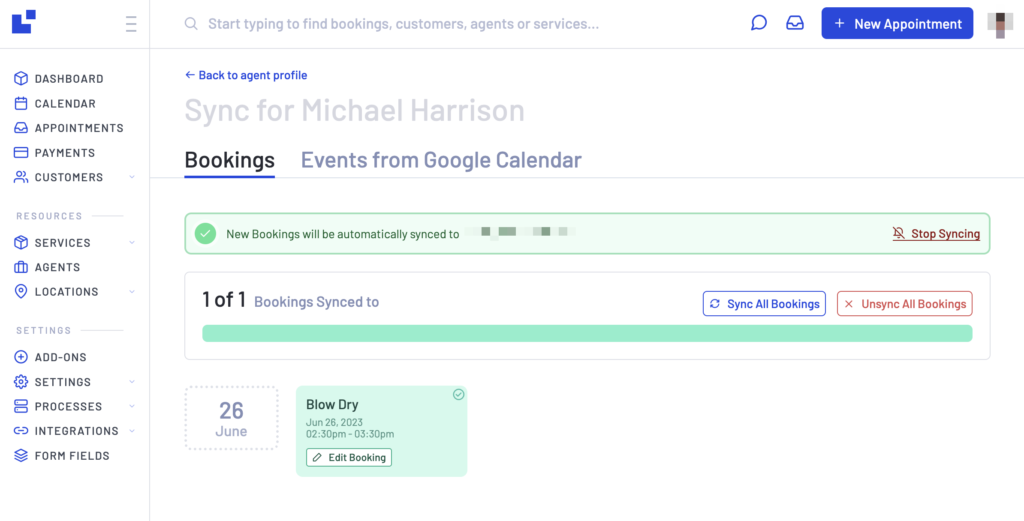
When you open the sync manager, you will see two tabs: Bookings in Latepoint and Google Calendar Events. First tab shows bookings of the selected agent in your LatePoint database, you can sync either all of them (Sync all bookings to Google link) or pick individually by clicking on a circular arrows icon next to each booking. Synced bookings will appear green.
Two Way Sync
If you want two-way sync (google will ping your server everytime there is a change on connected calendar) you will need to click “Enable Auto-Sync” button
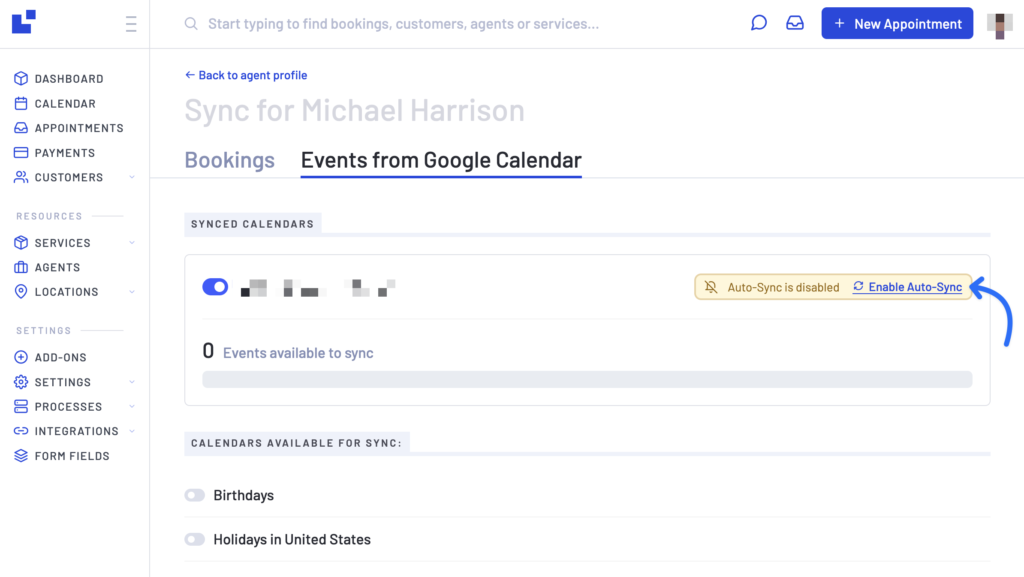
Once two-way sync is enabled it will turn green, you can disable it anytime you want if you wish so.
note: You don’t have to refresh token manually, it should keep itself updated as long as your website is active, however in case it suddenly expires or you made some modifications in your Google Console Project API you can click “Refresh Token” to refresh it
Events on my Calendar
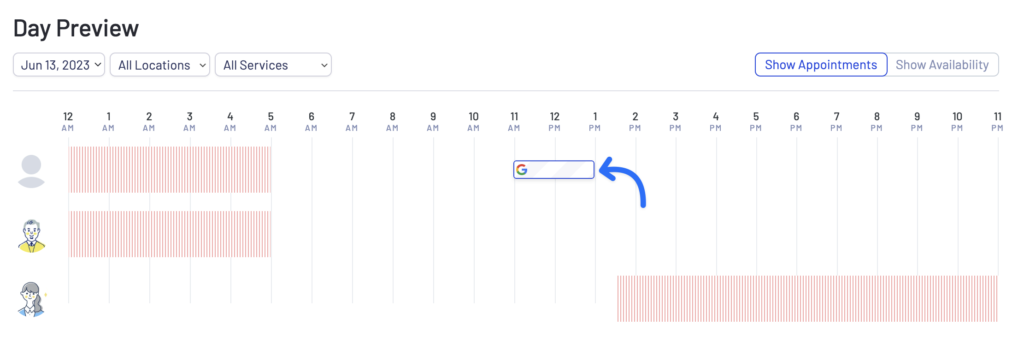
When you have events from your Google Calendar synced to LatePoint database, they will appear in your latepoint calendar with a distinct Google logo with white box with blue border:
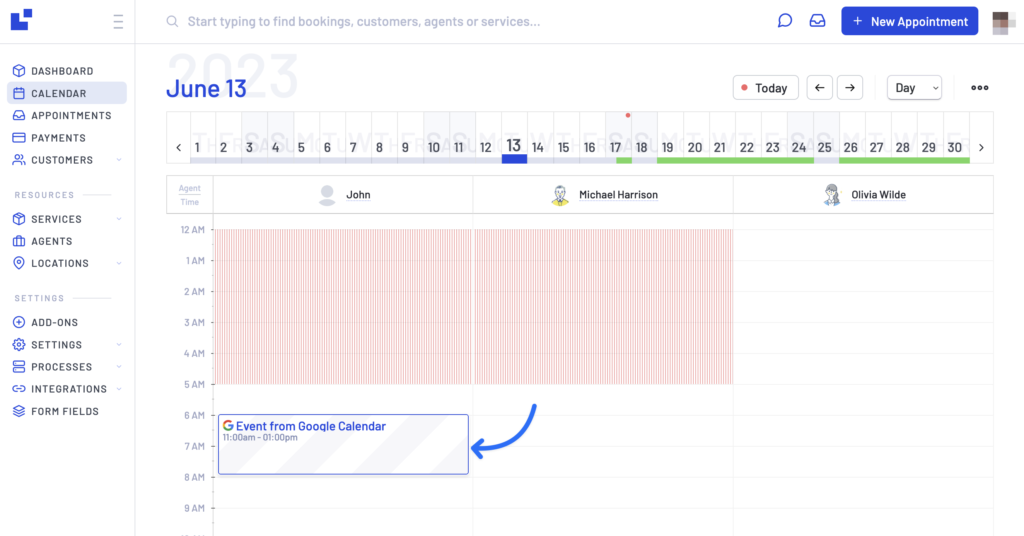
And on a timeline: