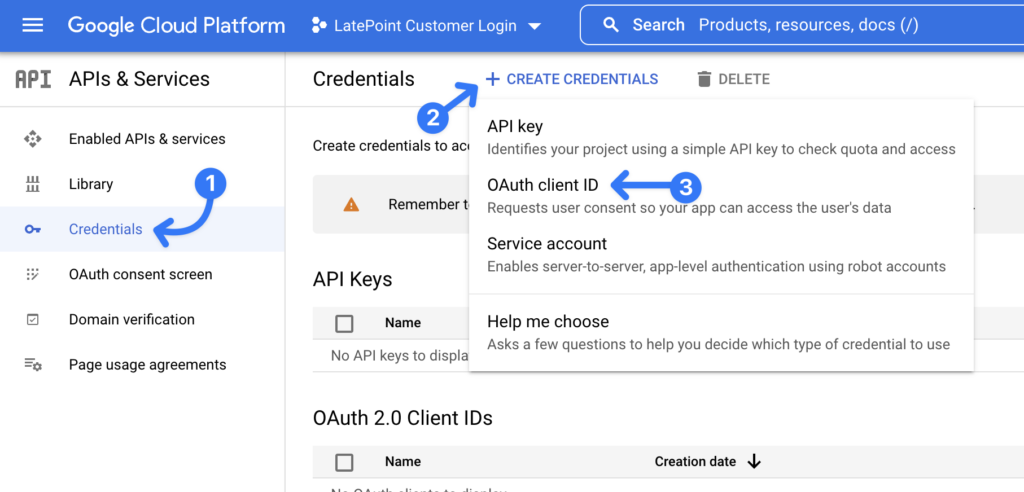
Go to https://console.cloud.google.com/apis/dashboard and create a new project. Then open Credentials tab and create new credential OAuth client ID
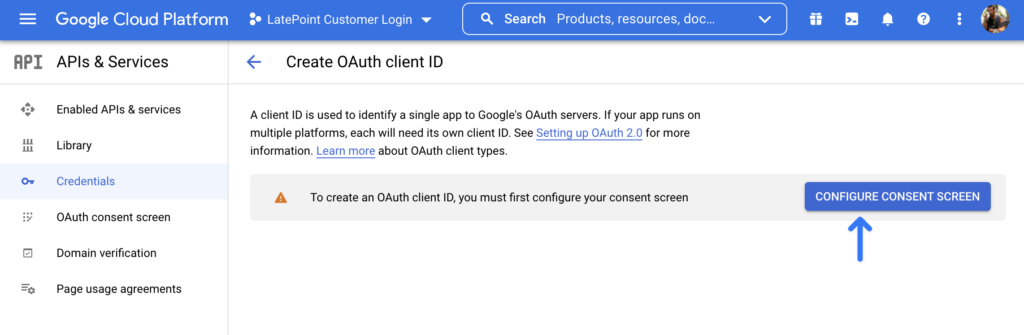
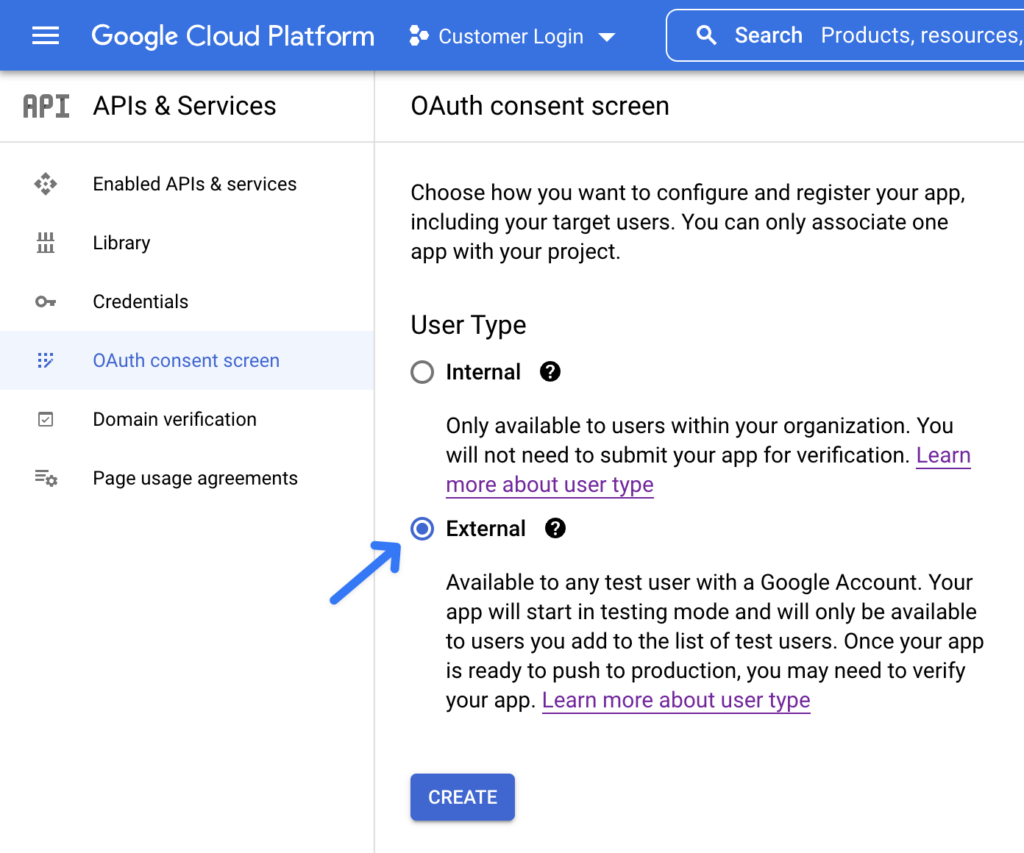
If it’s a new project and you haven’t created OAuth consent screen – Google will ask you to configure it first, before creating an API credential. Go ahead and click “Configure consent screen”:
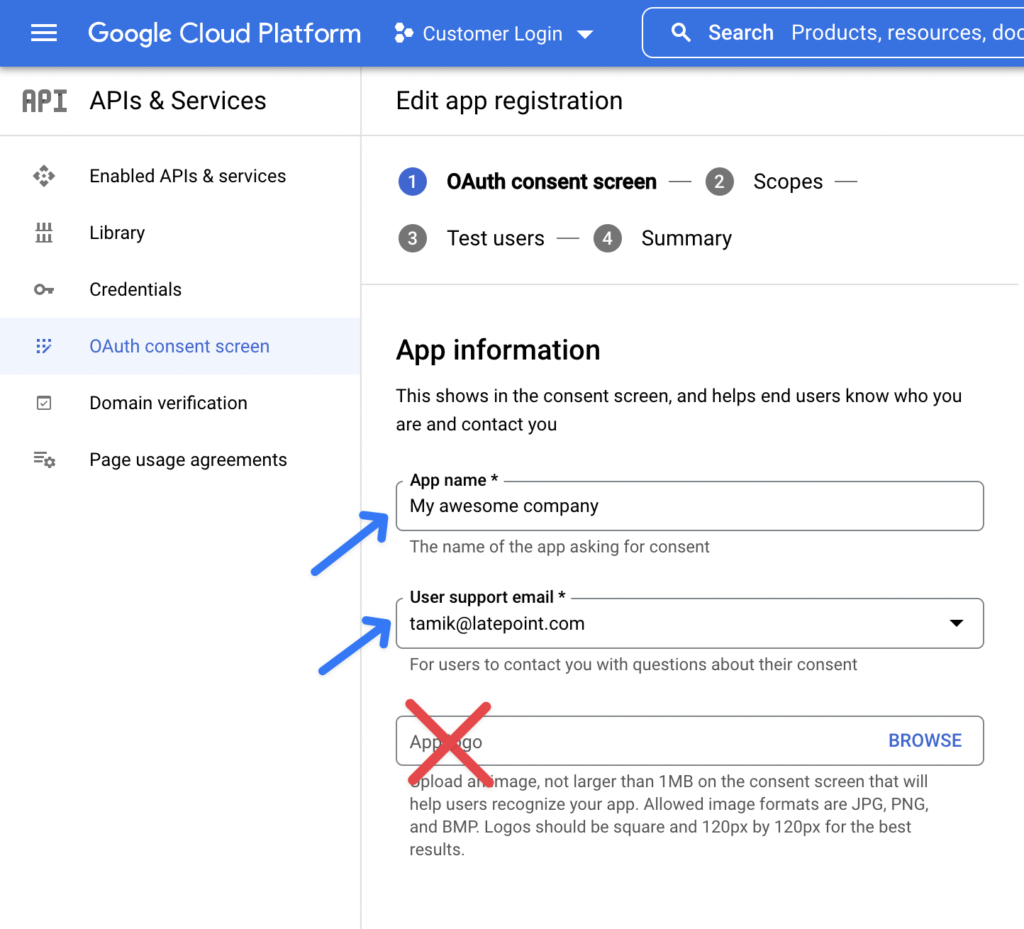
After you click “create” button – you will be presented with OAuth consent screen editor. When you configure consent screen – do NOT set a logo, otherwise your app will have to be manually verified by google to be able to connect to customer accounts. All you need to enter is your “App Name” (could be your company name) and support and developer email address.
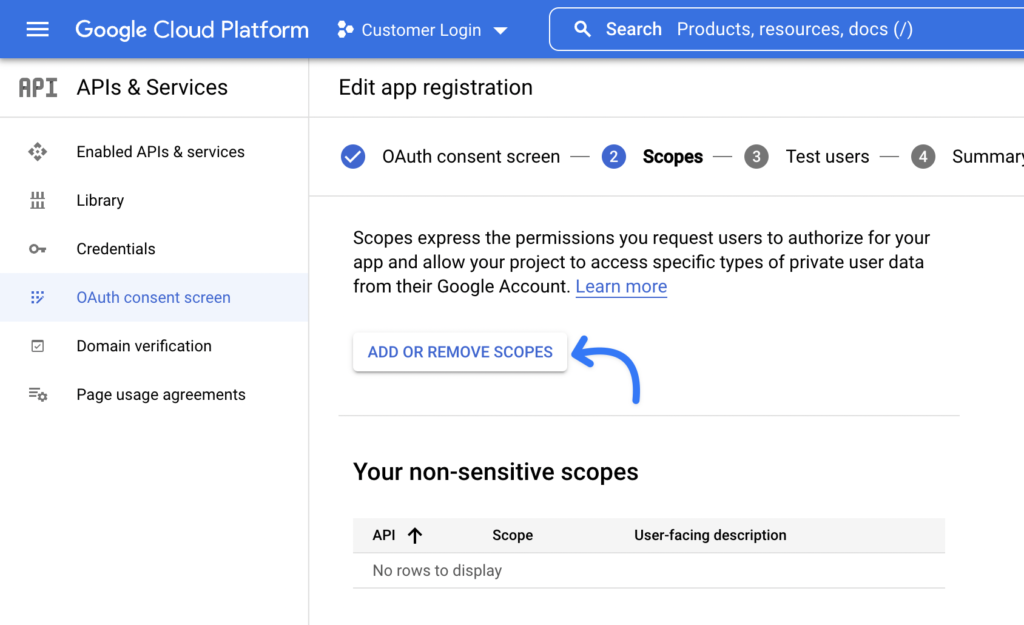
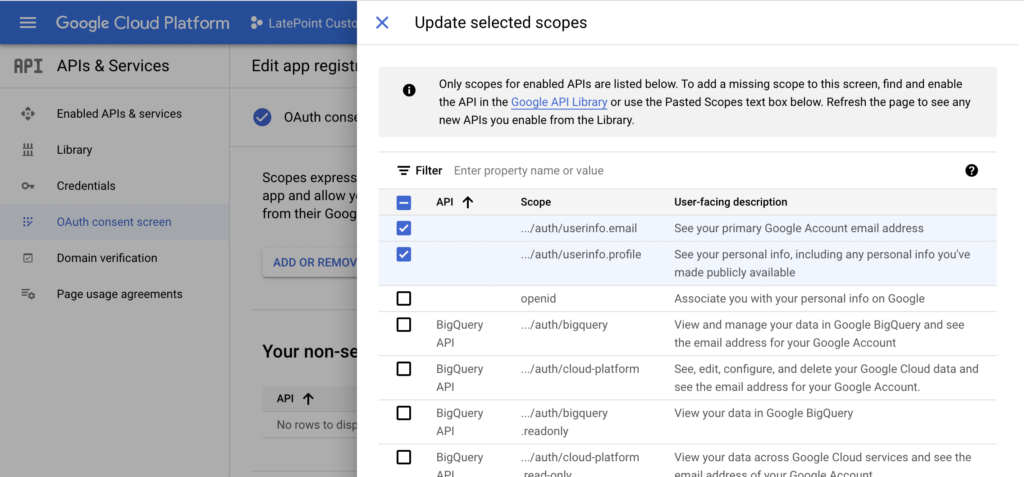
Now you have to select scopes to be able to retrieve email, avatar and customer name from their google account once they give consent. Click Add or Remove Scopes button and select …/auth/userinfo.email and …/auth/userinfo.profile scopes
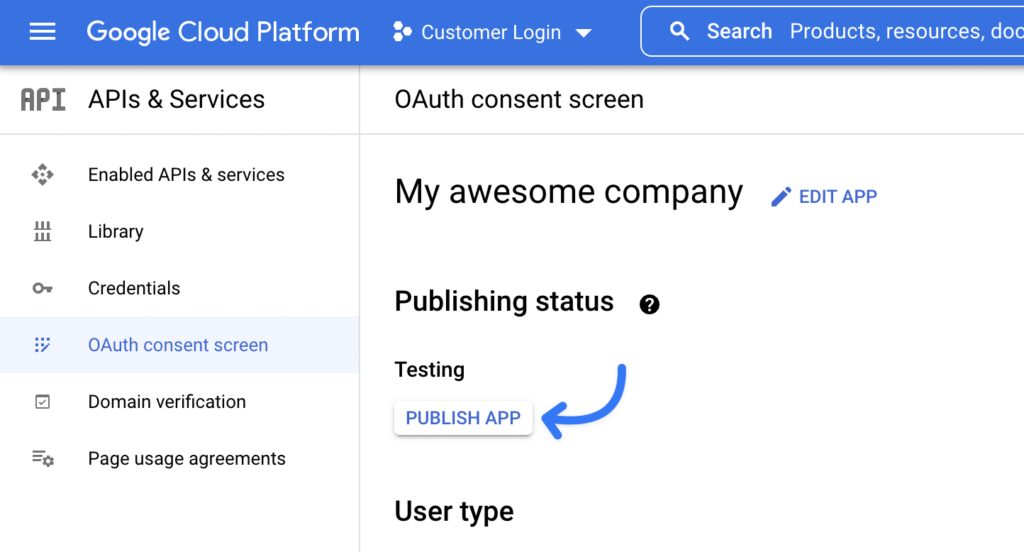
Click “Save and continue” until you see this screen, where you have to “Publish” your app in order for it to have public access, since you haven’t uploaded a logo or requested any sensitive scopes – your app will not need a manual verification from Google.
Note: In case you accidentially requested a sensitive scope or uploaded an app icon and Google told you that you have to verify your app because of that – you can simply delete this project and create a new one.
Once your app is published and OAuth consent screen has been setup – you can go ahead and create OAuth client ID credentials:
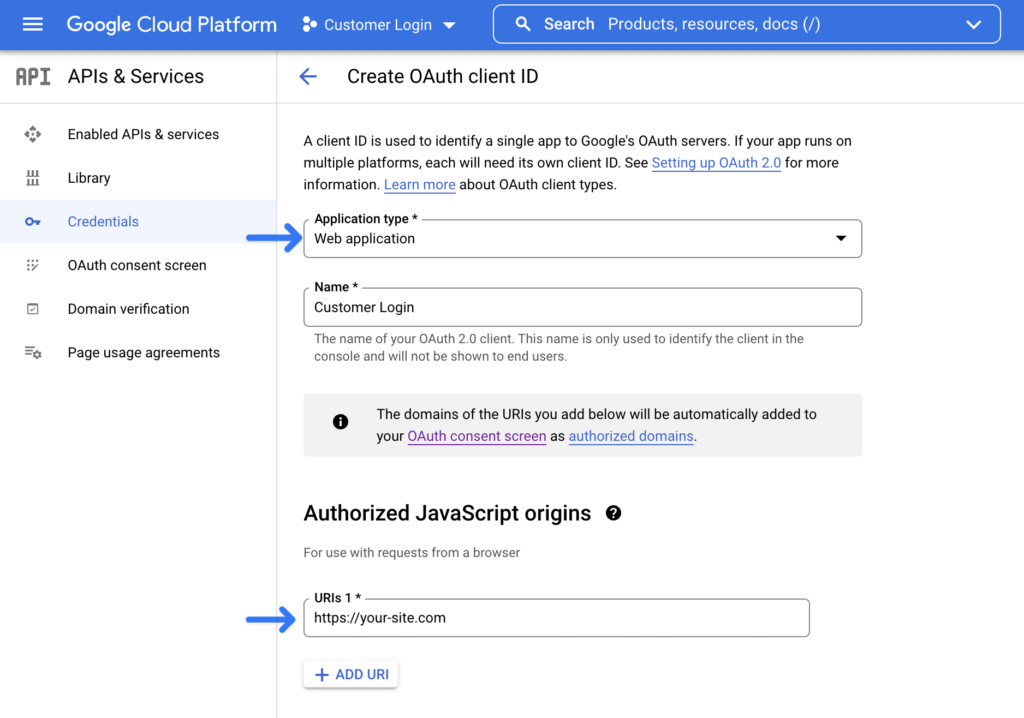
Set “Web application” for the “Application type” field and enter your site address in the “Authorized javascript origins” field
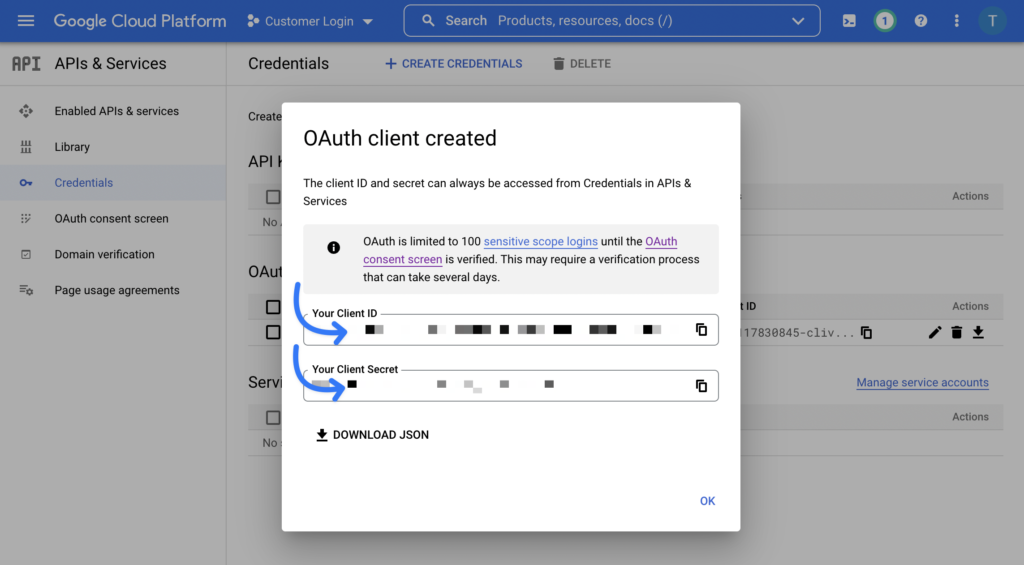
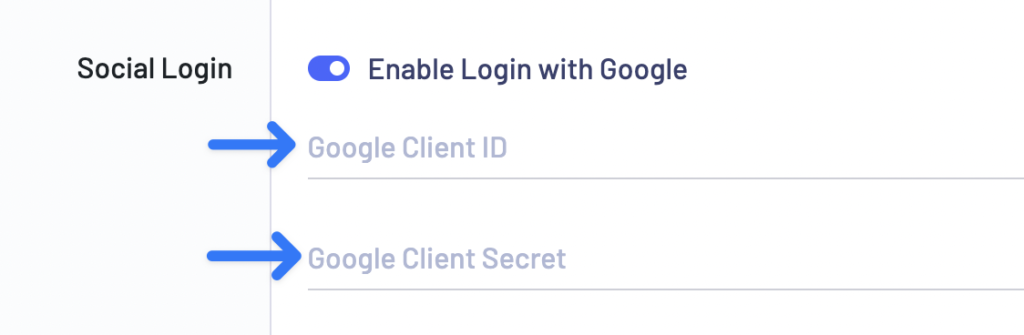
Click “Create” and you are all set. You should see a modal with your Client ID and Client Secret that you will need to enter into your LatePoint settings for Google login: